TheOpenPresenter Studio is the free, open source desktop version of
the app. It runs entirely on your own laptop or PC, works offline,
and needs no account, the closest fit if you're replacing software
like ProPresenter or EasyWorship. This guide shows you how to install
it and run your first Sunday service.
Before you start
Studio is available for Windows today, with macOS on the way. You'll want
the laptop or PC that sits at the front of your church, and a TV or
projector to connect to. Because everything runs on your own machine, you
don't need an internet connection to present. It's still good to be online
when you can, though, some features like importing lyrics from the online
song library need an internet connection.
1
Download Studio
Studio is a free download. There's nothing to buy and no license to
sign up for.
Under TheOpenPresenter Studio,
download the Windows installer (the .exe). There's also an .msi if your church manages
installs centrally.
On a Mac? Studio for macOS is coming soon, so check back on the
downloads page.
Good to know:
Studio is the whole app packaged as one desktop program. Like the rest
of the project, it's completely free and open source.
2
Install and open it
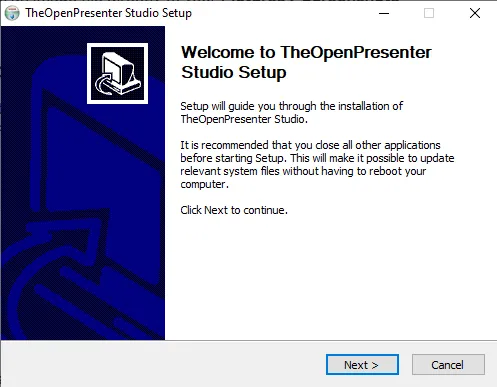
Run the installer you just downloaded. When the setup window
appears, click Next to
begin.
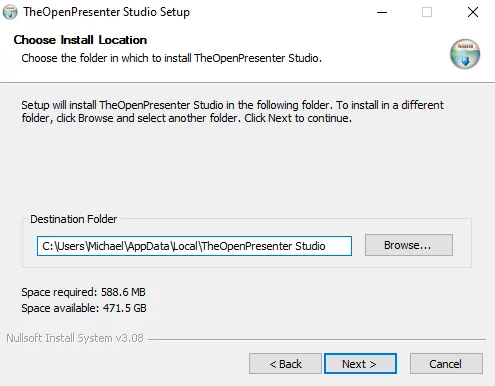
Choose where to install it (the default location is fine for most
people), then continue through the installer.
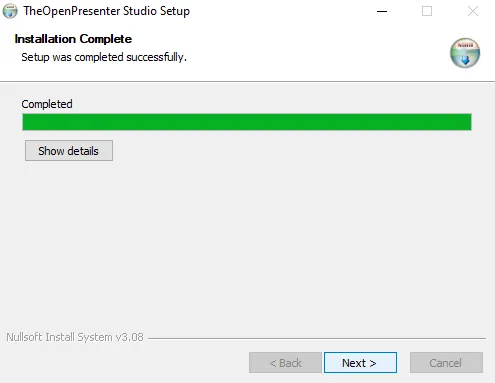
When you see Installation Complete,
you're done. Open TheOpenPresenter Studio from
your Start menu or desktop.
The first time you open it, give it a moment to start up. Studio
runs its own private copy of TheOpenPresenter behind the scenes, so
the very first launch takes a little longer.
That's it:
No account, no sign up, and no internet needed to get going. Everything
you create is stored on your own computer.
3
Create a project for Sunday
A project is a single service
or event, think of it as "this Sunday's service." You'll make a new
project each week and fill it with everything you want to show: song
lyrics, announcements, the sermon, and more.
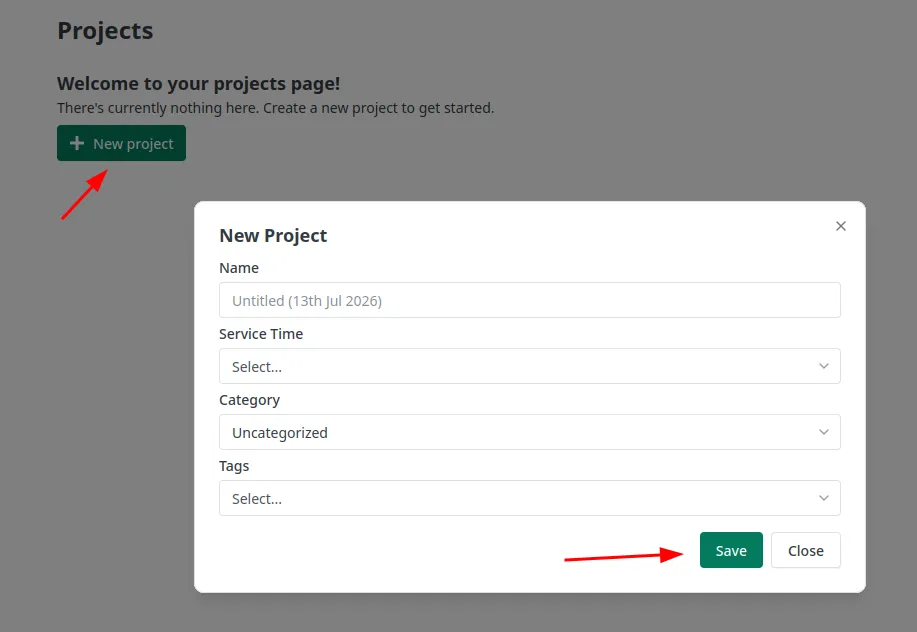
From the Projects page,
click New project.
Give the project a Name,
such as "Sunday Service, 13 Jul". If you leave it blank, it's named
with today's date.
Set the Service Time for the
service. You can optionally add a Category and Tags to keep things
organized week to week.
Click Save. The project
opens in the editor, ready for you to add content.
4
Add lyrics
Let's add the songs for your worship set. Lyrics live in the Lyrics Presenter, which shows
song words on the screen one section at a time.
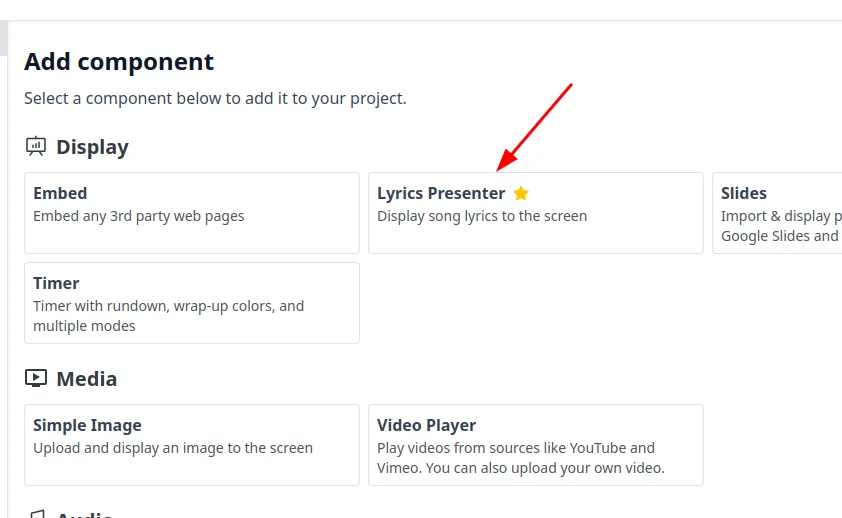
In your project's editor, click Add component and choose Lyrics Presenter from the
Display section.
The Add song(s) window opens.
You have a few ways to add a song:
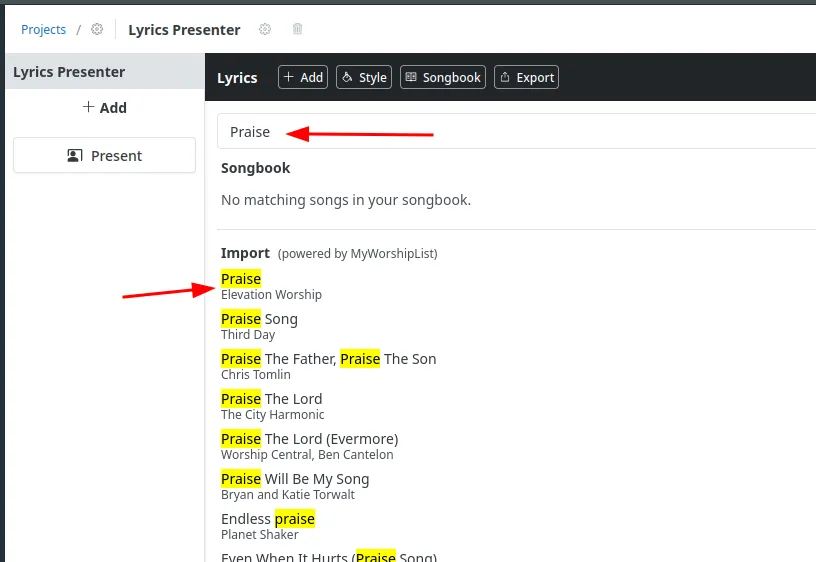
Search, type a song
title into the search box to find it in your Songbook (songs
you've saved before) or import it from the online song library.
Create new song, click
this to type or paste the lyrics in yourself.
Example, importing "Praise":
Type Praise into the search
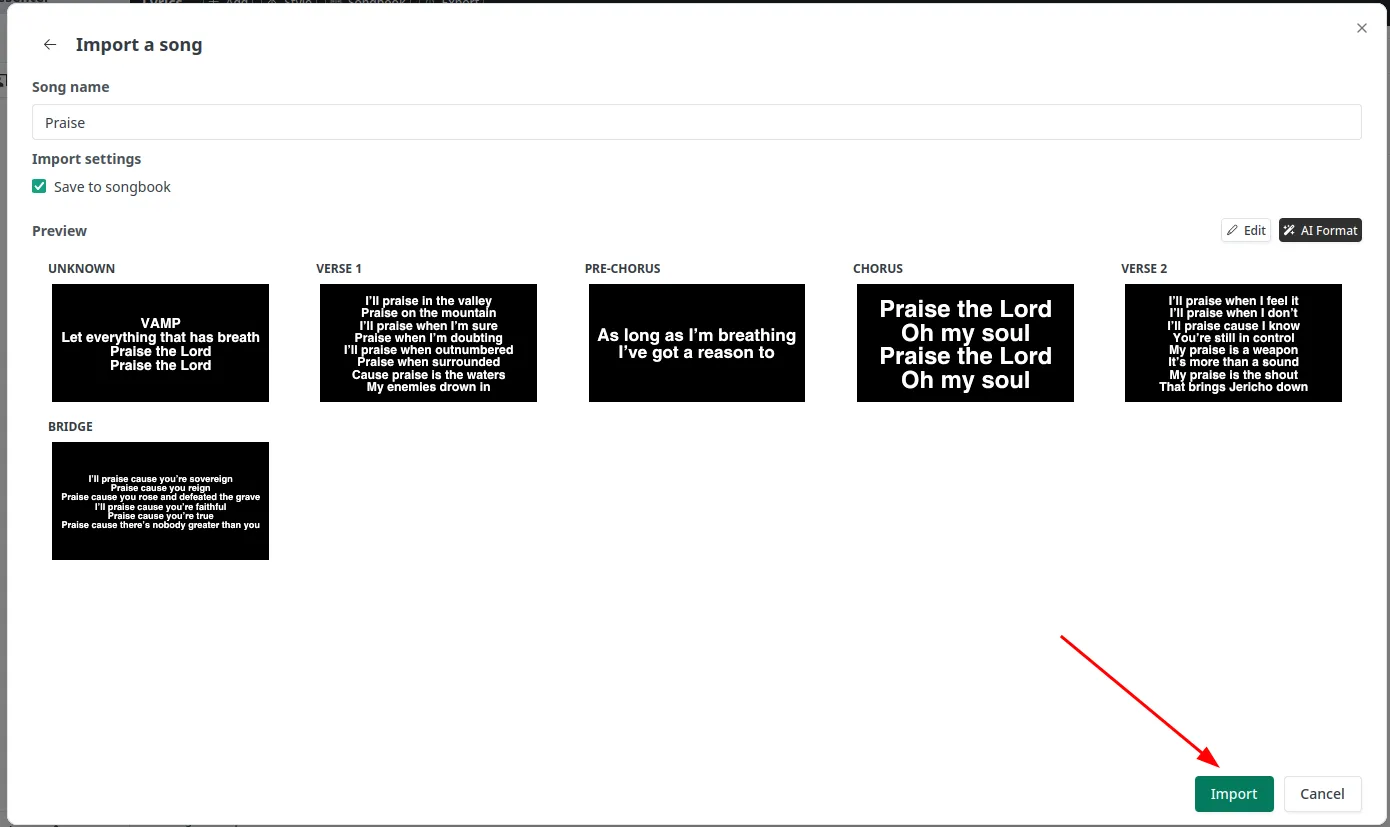
box and pick it from the song library. The Import a song window opens
with the lyrics already filled in and split into sections like Verse 1
and Chorus. Each section becomes its own slide on the screen.
Want to tidy the formatting? Click AI Format (the magic-wand
button) and it will clean up the words into neat verses and
choruses for you.
Tick Save to songbook if you
want to reuse this song next time, then click Import to add it to your set.
Repeat for each song you need.
Tip:
Keep one line of thought per slide. Shorter sections are easier for the
congregation to read and easier for you to follow along while presenting.
5
Present to your screen
On Sunday, present straight from Studio to your TV or projector.
Connect your TV or projector to the computer, and set your display
to extend (so the projector
is a second screen, not a mirror of your laptop).
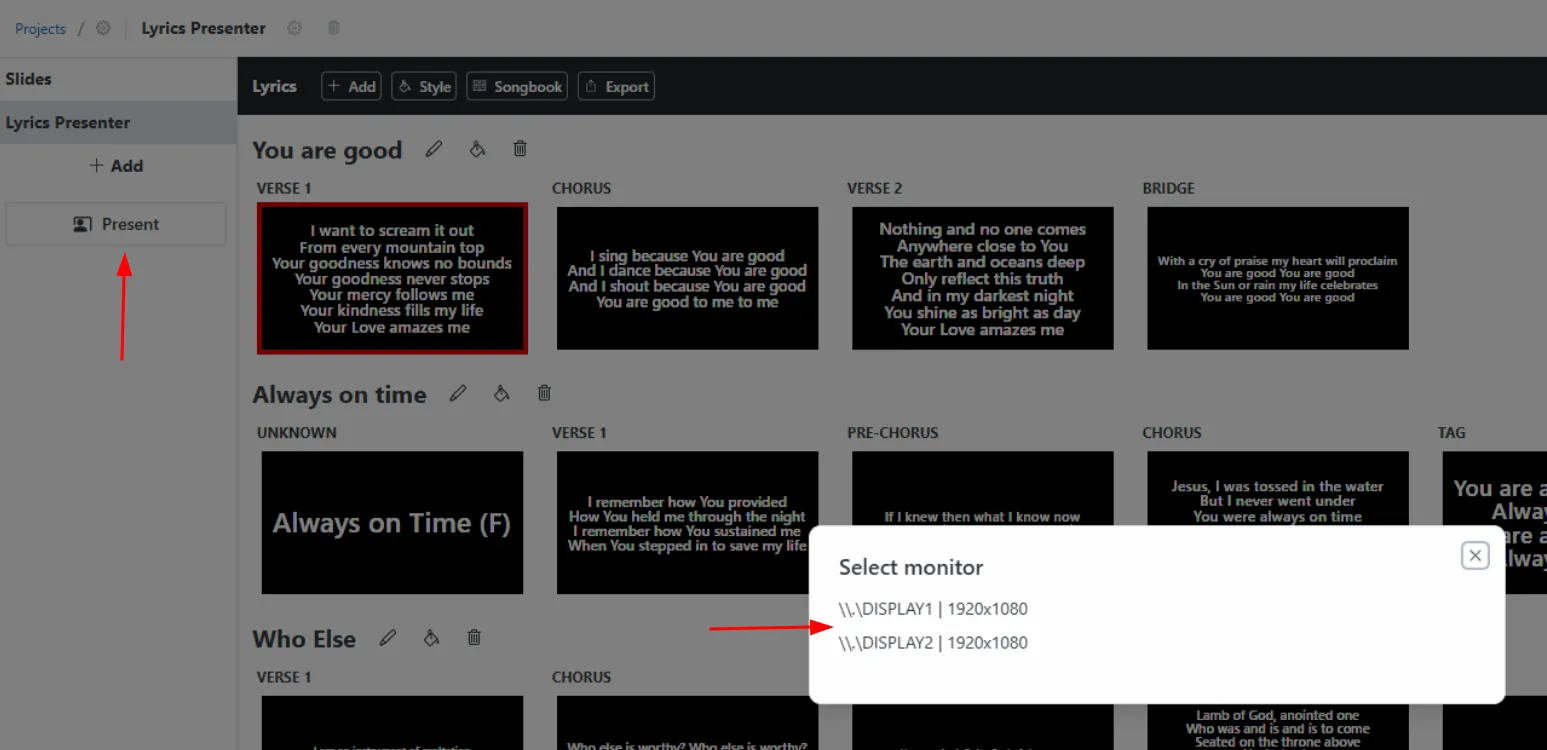
Open this week's project and click the Present button.
In the Select monitor list,
choose the display that's your TV or projector (for example, DISPLAY2). The lyrics fill
that screen while you keep the controls on your laptop.
Click a song section to send it to the screen. Move through the set
as the service goes on, and stop presenting when you're done.
Tip:
Because Studio runs offline, your service keeps working even if the
church internet drops out mid-song.
6
Connect to the cloud (optional)
Studio works completely offline, but you can connect it to the cloud
whenever you want to work together as a team.
Once connected, your team can help build the service from their own
devices, and you can control the show from your phone, just like the
online version. If you're happy working on one machine, you can skip
this entirely.
Ready to try Studio?
Download it free, install it on the laptop at the front, and you're
ready for Sunday. No account, no catch.