How to use the online version of TheOpenPresenter for church
This guide walks you through everything you need to run your Sunday
service from your browser, no install required. You'll register an
account, set up your church, build a project for the week, add your
song lyrics, and put it up on the screen.
Before you start
You only need a computer with a web browser and an internet connection.
Because the online version runs entirely in your browser, a good, stable
internet connection is important, especially on Sunday while you're
presenting live.
1
Register your account
Head to the sign-up page and create your free account. This is the
login you'll use to prepare and run every service.
Fill in your Name, Username, E-mail, and a Password (you'll confirm
the password a second time). A username is suggested for you
automatically as you type your name, you can keep it or change
it.
Click Register. You'll be
taken straight into TheOpenPresenter.
Check your inbox and confirm your email address when prompted, so
you don't lose access to your account later.
Tip:
Each volunteer can register their own account. Once your church is set
up, you can add them to the organization so the whole team shares the
same projects and songs.
2
Create your church
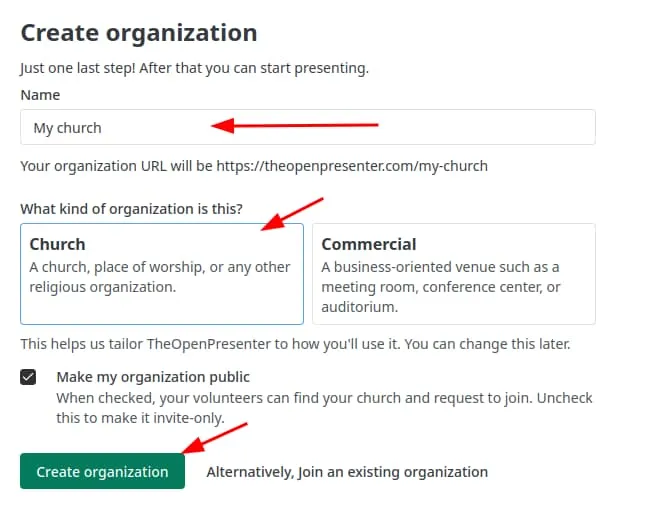
Right after registering, you'll be asked to create an organization.
This is your church's home in TheOpenPresenter, where all your
projects live.
On the Create organization screen, enter your church's Name. A web address (URL)
is generated from the name automatically, you'll see a preview of
it below the field.
Under "What kind of organization is this?", select Church. It's selected by
default, so you can usually leave it as it is.
Click Create organization.
Why this matters:
Choosing Church tailors
TheOpenPresenter for church use, for example, church-focused tools like the Lyrics Presenter are switched
on. You can change the type later if you need to.
3
Create a project for Sunday
A project is a single
service or event, think of it as "this Sunday's service." You'll
make a new project each week and fill it with everything you want to
show: song lyrics, announcements, the sermon, and more. This is how
you prepare ahead of time.
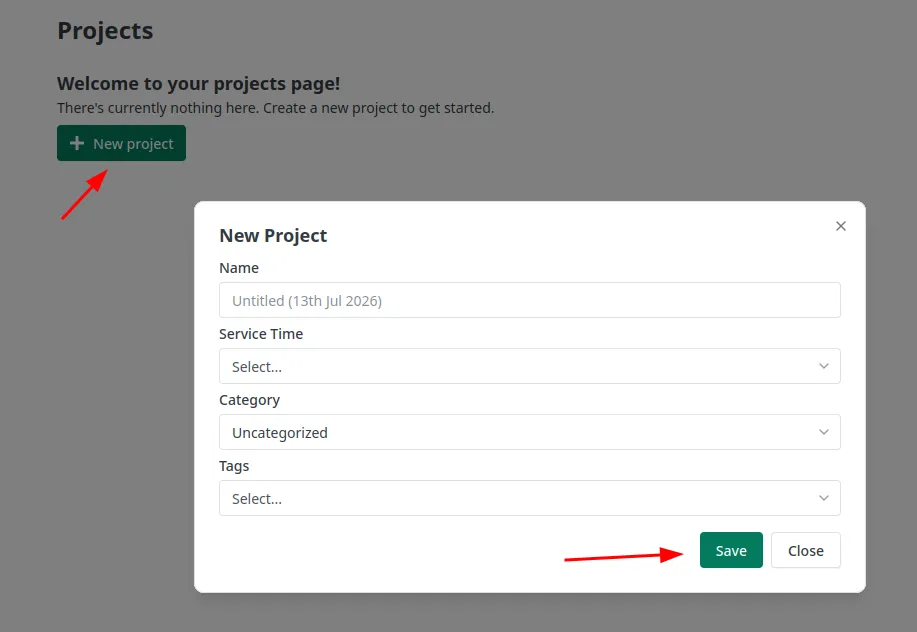
From your church dashboard, click New project (there's also a
quick New button at the top
right).
Give the project a Name,
such as "Sunday Service – 13 Jul". If you leave it blank,
it's named with today's date.
Set the Service Time for
the service. You can optionally add a Category and Tags to keep things
organized week to week.
Click Save. The project
opens in the editor, ready for you to add content.
Tip:
Prepare during the week from any device. Everything is saved to the
cloud automatically, so the project will be ready and waiting when you
open it on Sunday.
4
Add lyrics
Let's add the songs for your worship set. Lyrics live in the Lyrics Presenter, which shows
song words on the screen one section at a time.
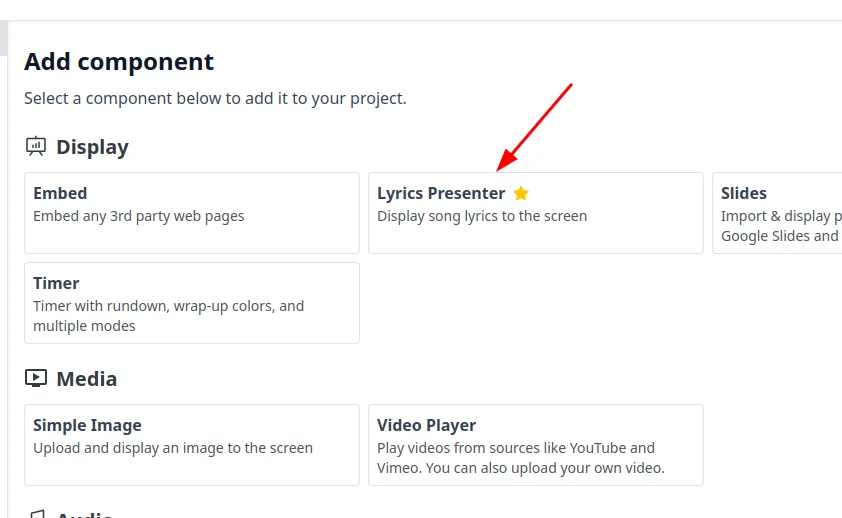
In your project's editor, click Add and choose Lyrics Presenter from the
Display section.
The Add song(s) window
opens. You have a few ways to add a song:
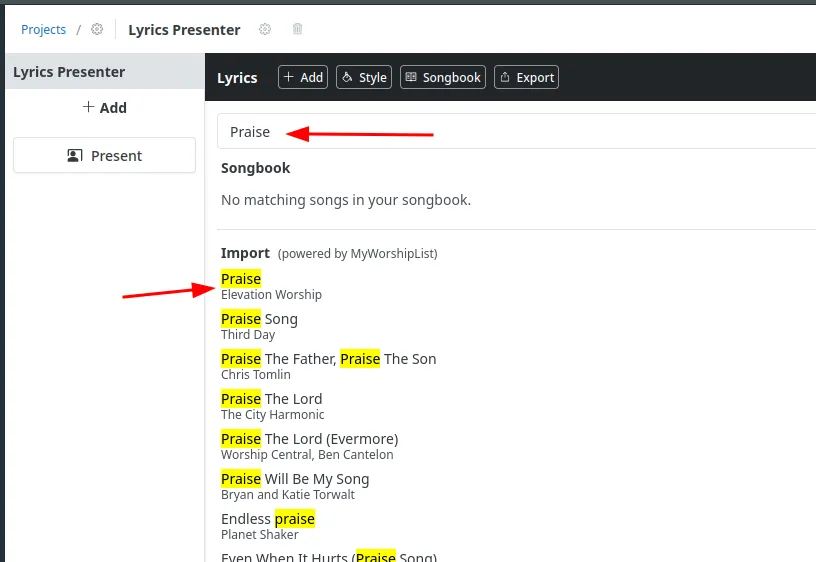
Search, type a song
title into the search box to find it in your Songbook (songs
you've saved before) or import it from the online song
library.
Create new song, click
this to type or paste the lyrics in yourself.
Example, importing
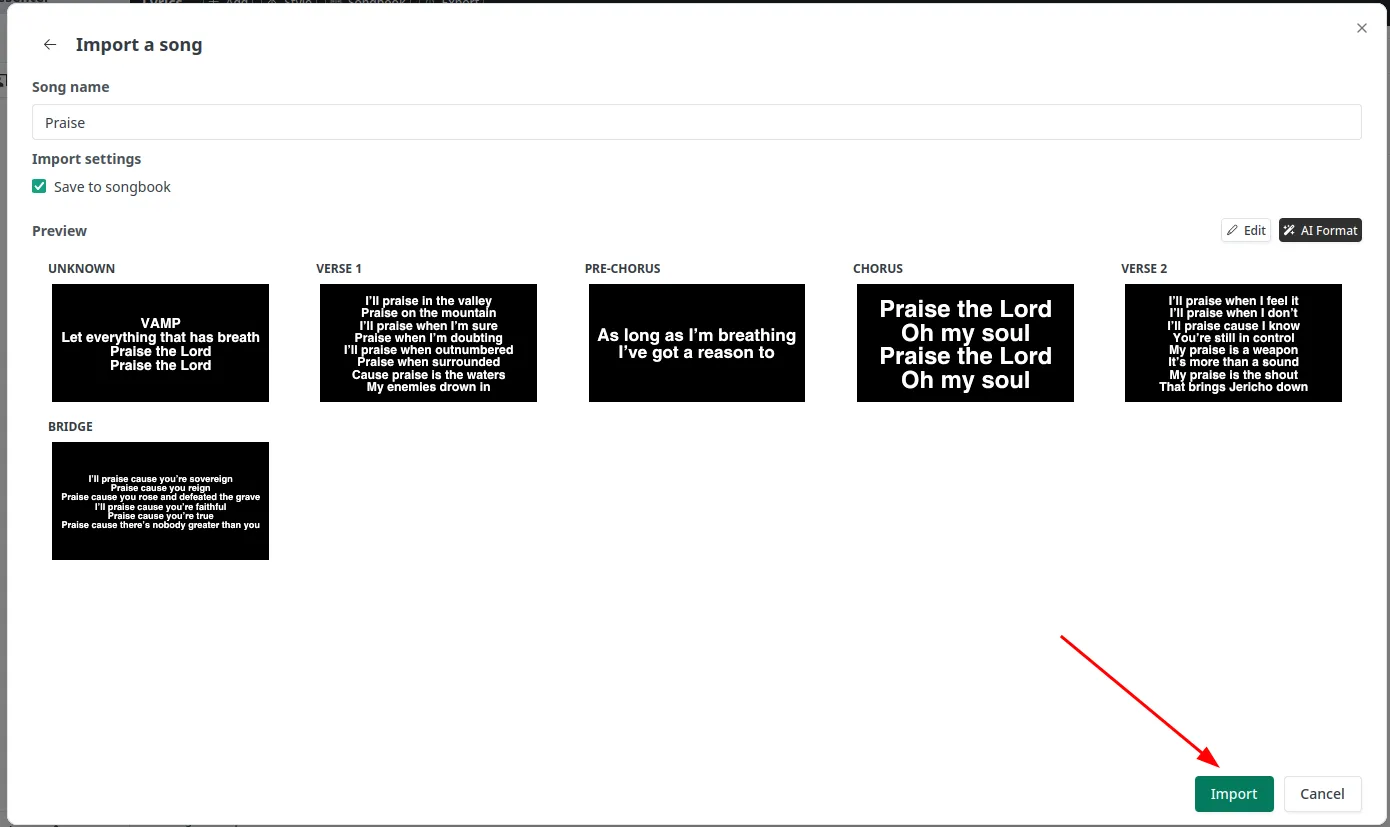
"Praise": Type Praise into the
search box and pick it from the song library. The Import a song window opens
with the lyrics already filled in and split into sections like Verse 1
and Chorus. Each section becomes its own slide on the screen.
Want to tidy the formatting? Click AI Format (the magic-wand
button) and it will clean up the words into neat verses and
choruses for you.
Tick Save to songbook if
you want to reuse this song next time, then click Import to add it to your
set. Repeat for each song you need.
Tip:
Keep one line of thought per slide. Shorter sections are easier for
the congregation to read and easier for you to follow along while presenting.
5
Present to the screen
On Sunday, open your project on the computer that's connected to your
TV or projector. You'll control what's shown from the editor, and the
words appear on a separate screen for the congregation.
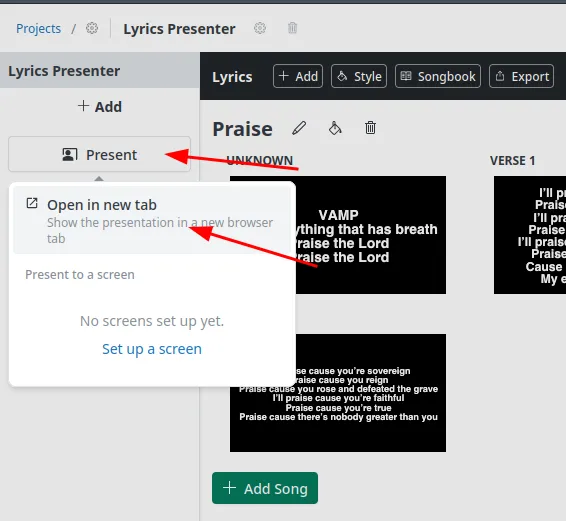
Open this week's project, then click the Present button.
Choose Open in new tab.
This opens the audience view, the actual slides, in a separate
browser tab.
Drag that new tab onto your TV/projector screen, then make it full screen by pressing F11 on Windows/Linux (or Control + Command + F on a Mac). This hides
the browser bars so only the slides are visible.
Back in the editor tab, click a song section to send it to the
screen. The congregation sees the words update instantly. Move
through the set as the service goes on.
Tip:
Keep the editor tab on your control screen and the full-screen tab on
the projector. That way the congregation only ever sees the slides, never
your controls.
6
Control from your phone (optional)
Don't want to be stuck at the computer? You can control the
presentation from your phone and change slides from anywhere in the
room. The full-screen output stays on your TV or projector, while
your phone becomes the remote.
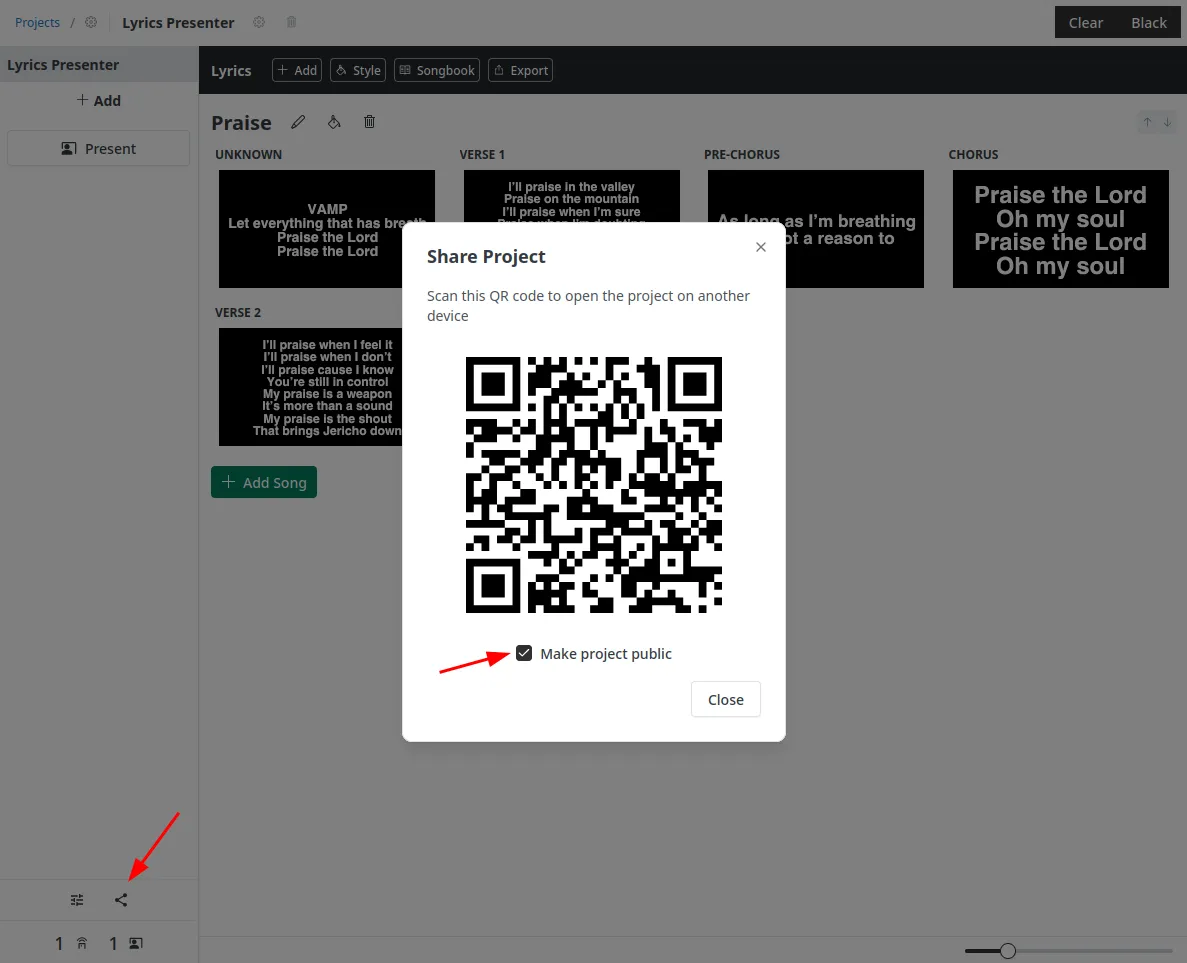
In the editor, click the Share icon at the
bottom-left of the screen. The Share Project window opens
with a QR code.
Tick Make project public so
your phone can open the project without needing to log in.
Scan the QR code with your phone's camera and open the link. The
same project opens on your phone.
On your phone, tap a song section to send it to the screen, just
like you would on the computer. The slides update instantly.
Tip:
Share the QR code with more than one person so your team can take turns
controlling the service. Untick Make project public afterwards
if you'd rather keep the project private.
That's it, you're ready for Sunday
Register once, prepare your project during the week, and present with
a couple of clicks. Ready to try it with your church?